How to DIY Quick and Easy Hanging Shelving in 5 easy steps
Storage is a common problem in most homes. We tend to have more stuff than space! Shelving is a great way to create more storage because it makes use of dead wall space without taking up any floor area. And if done correctly, shelving can be a beautiful focal point in a room as well as a being useful. But shelving can be so expensive!

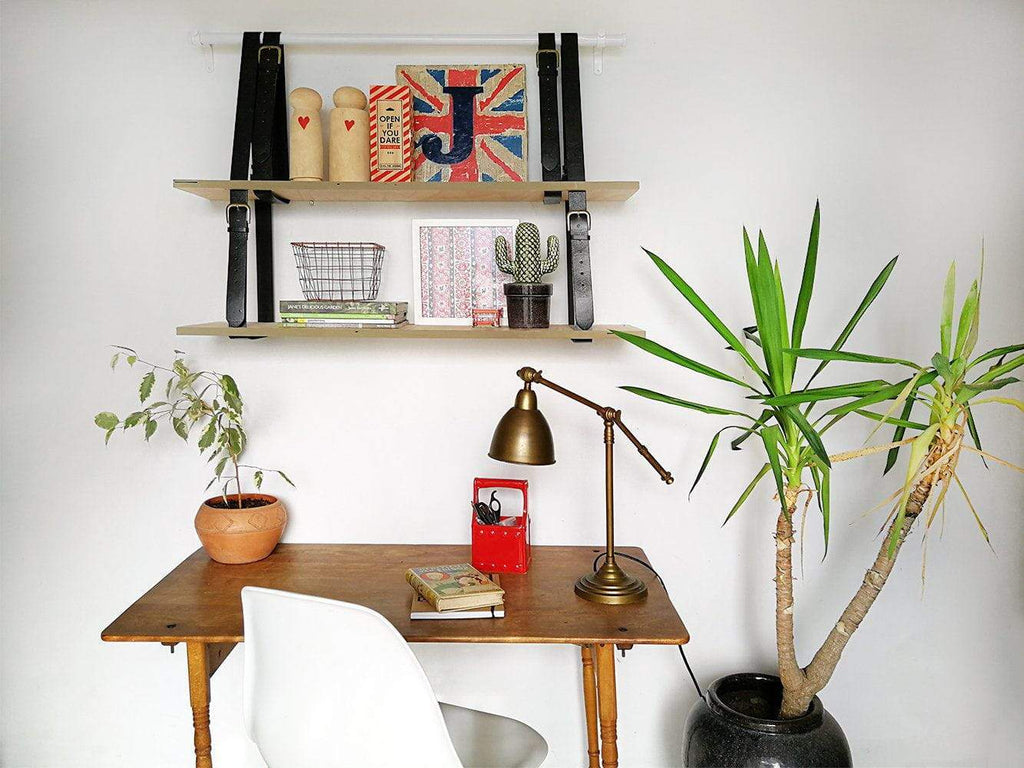
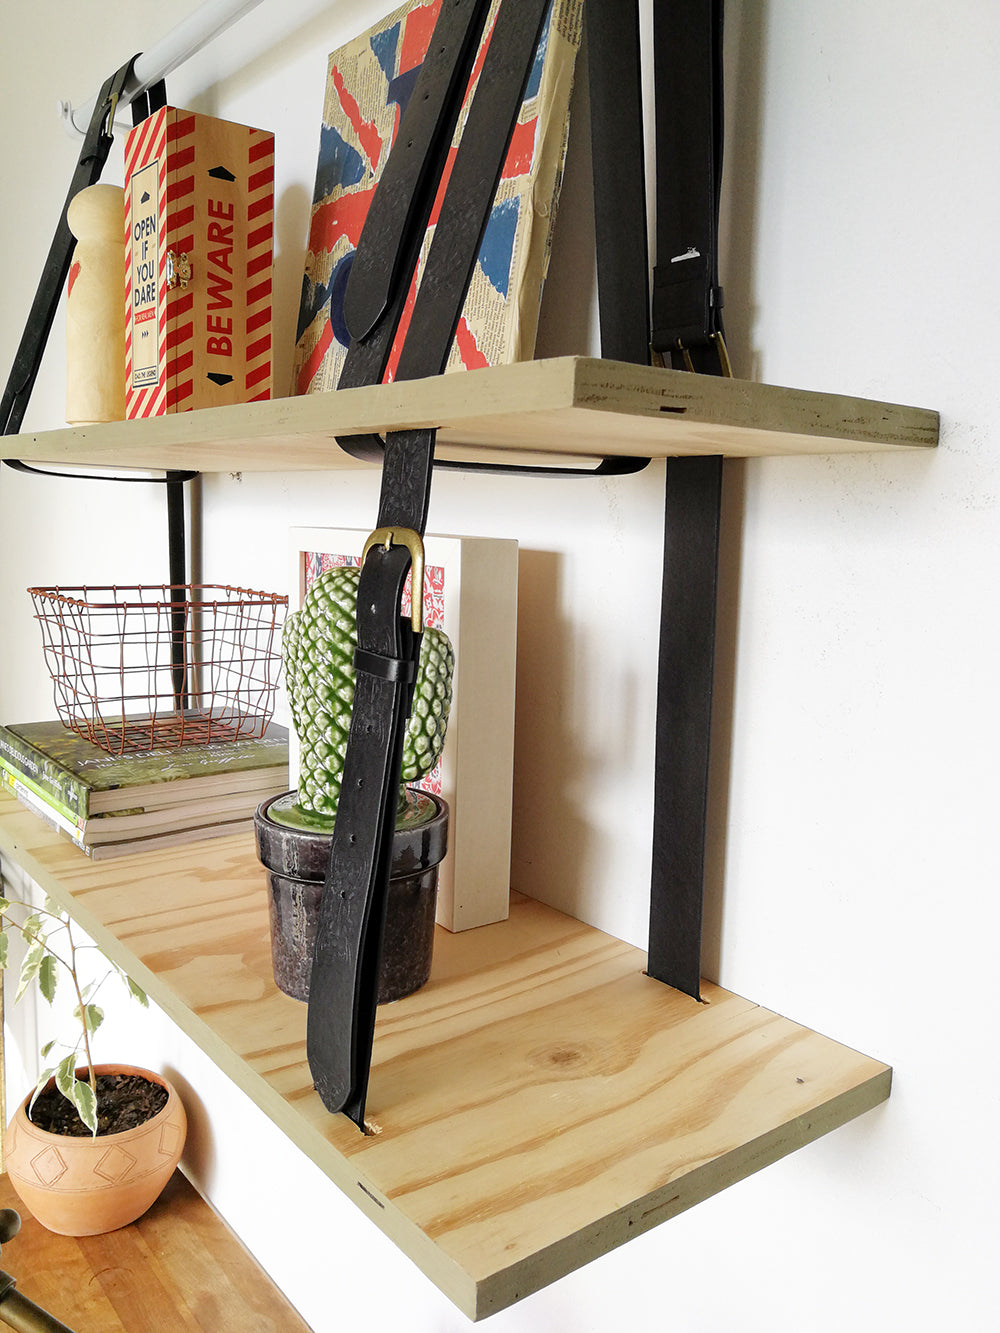
Curtain hardware is made to hold weight while looking great, so it makes perfect sense to utilize it for some hanging shelves. This very cute little shelf is sturdy and looks pretty and can be put together in a couple of hours. Try different belt and curtain hardware options to create the look you want – the options are endless! Try colourful rods for a fun focal in a kids’ room, or cast iron for a masculine look.
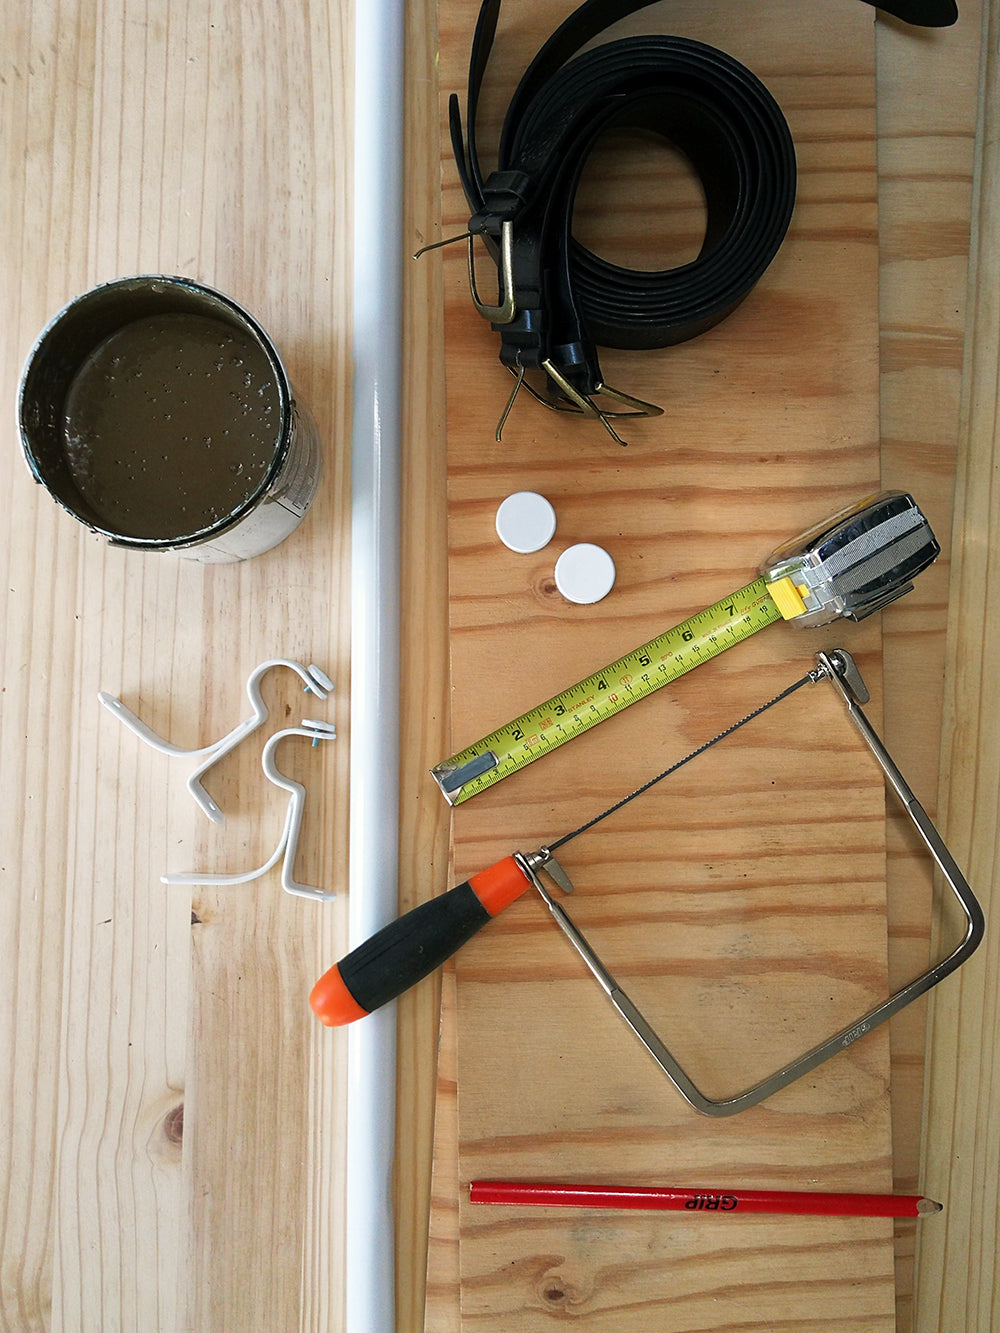
You will need:
- 6 belts
- 2 pieces of 5/8” pine plywood, cut to 8” x 40” and 9 ½” x 40”
- Paint in the color of your choice
- 40” curtain rod
- 2 x curtain brackets
- 2 x end caps
You will also need:
- 100 grit sandpaper
- Jigsaw or figure saw

Step 1:
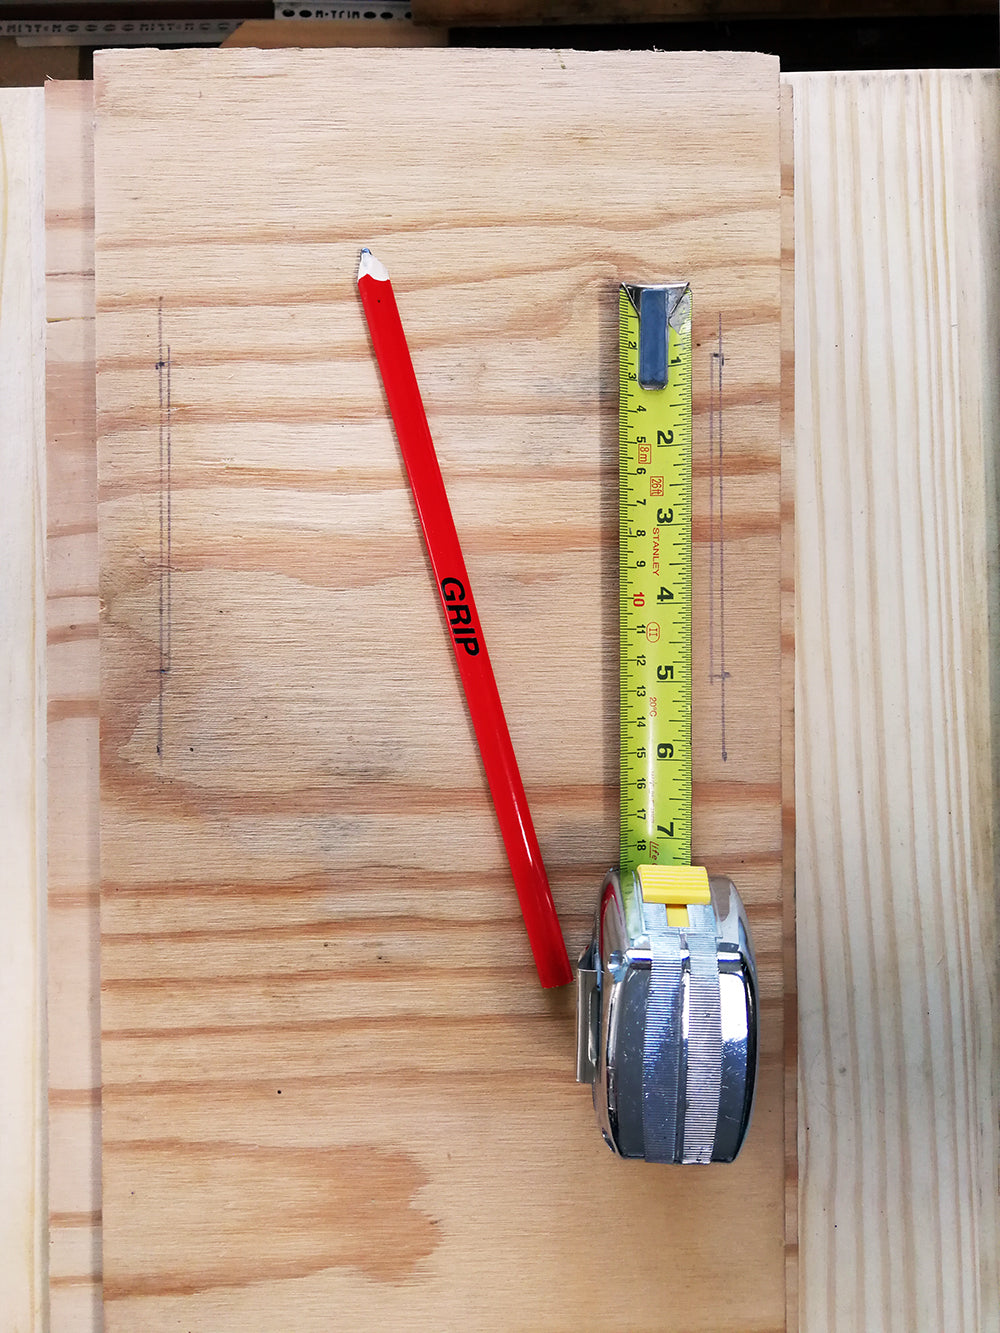
Using the template above, measure the slots where the belts will be inserted. The top shelf gets a longer 4” slot for two belts and the bottom shelf a 2” slot.
Step 2:
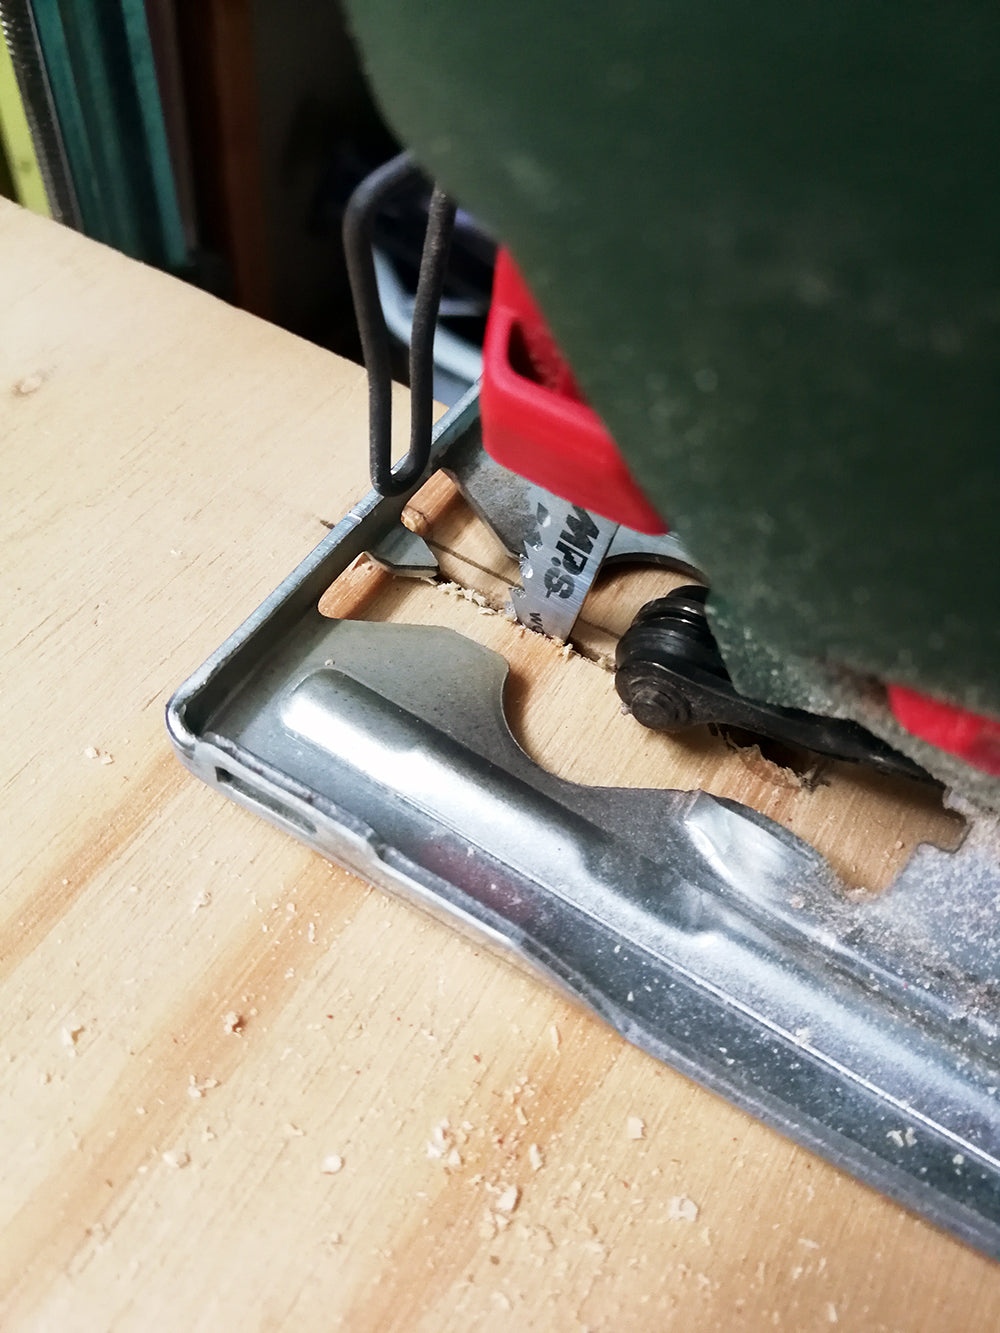
Drill holes into the slots until you have a space big enough to insert the jigsaw blade or figure saw. Then carefully cut the slots.
Step 3:
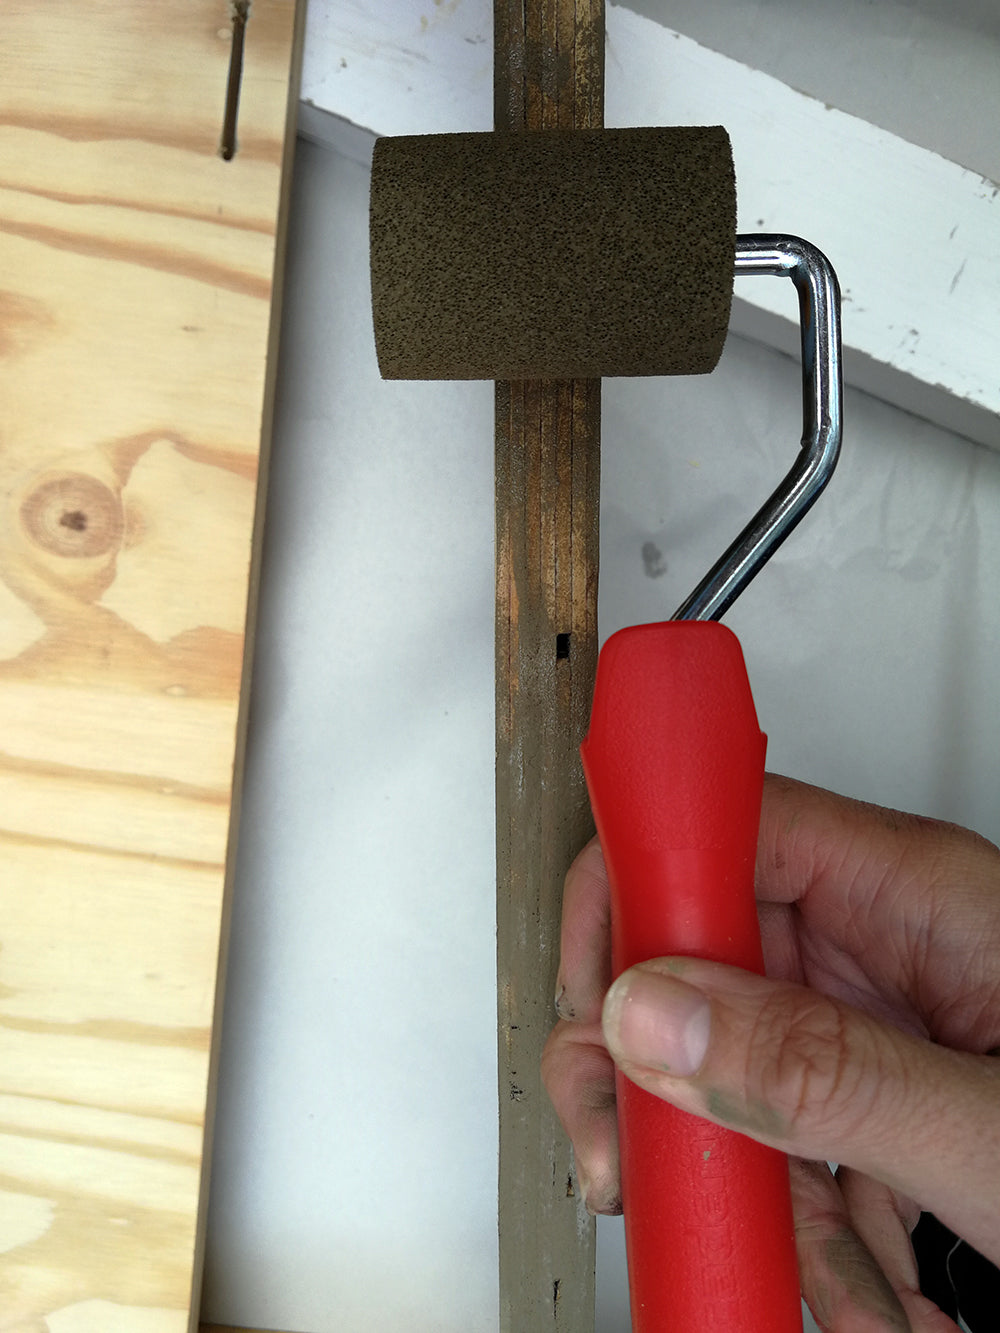
Use a small sponge roller to paint the edges of the shelves in the color of your choice. Allow to dry.
Step 4:

Lightly sand the shelves and wipe with a clean cloth to remove any dust.
STEP 5:
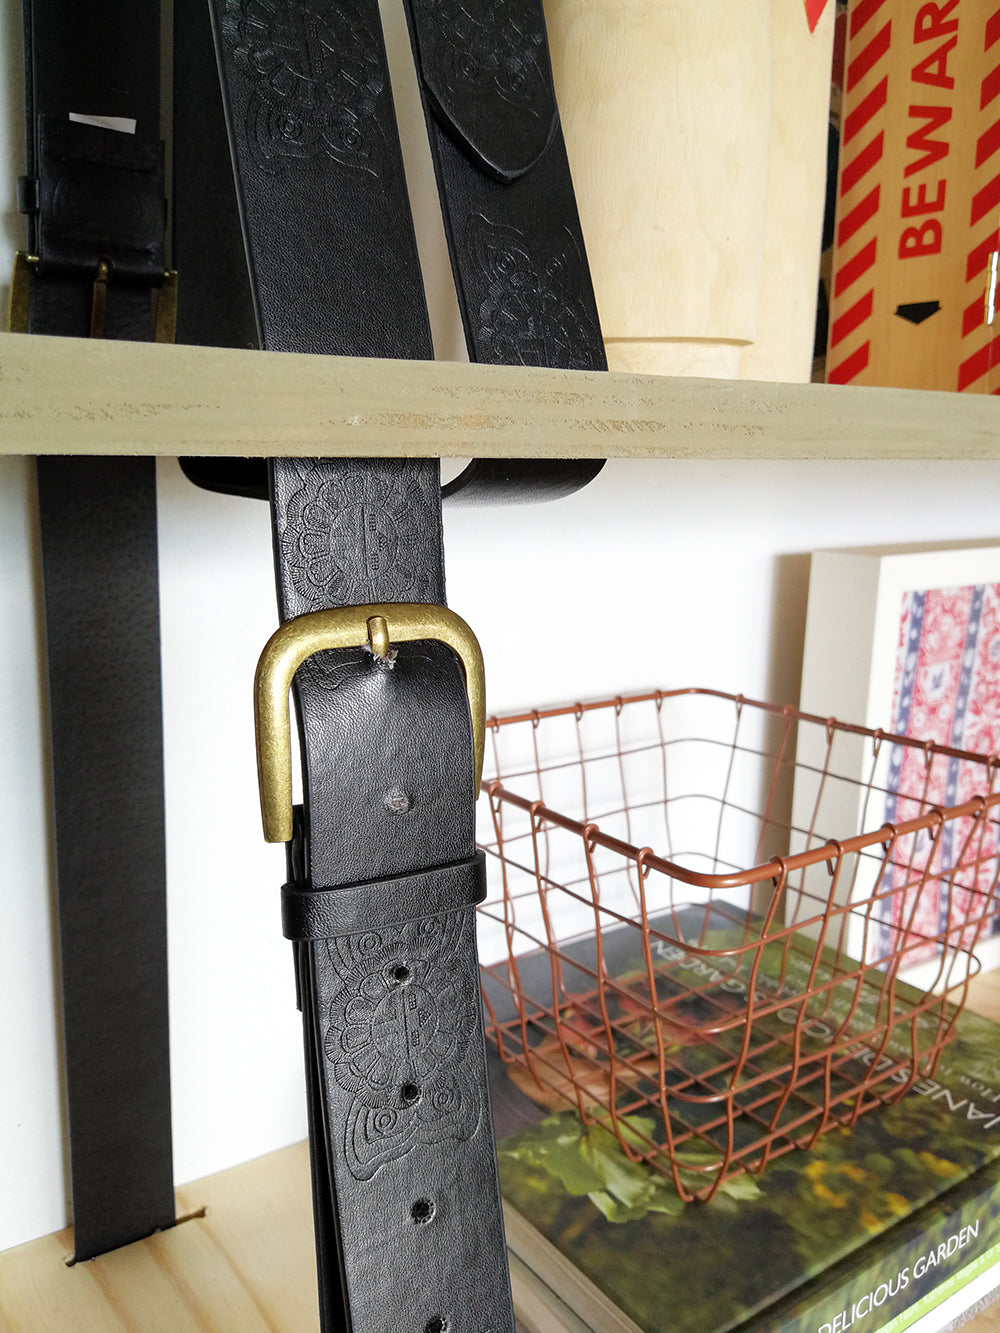
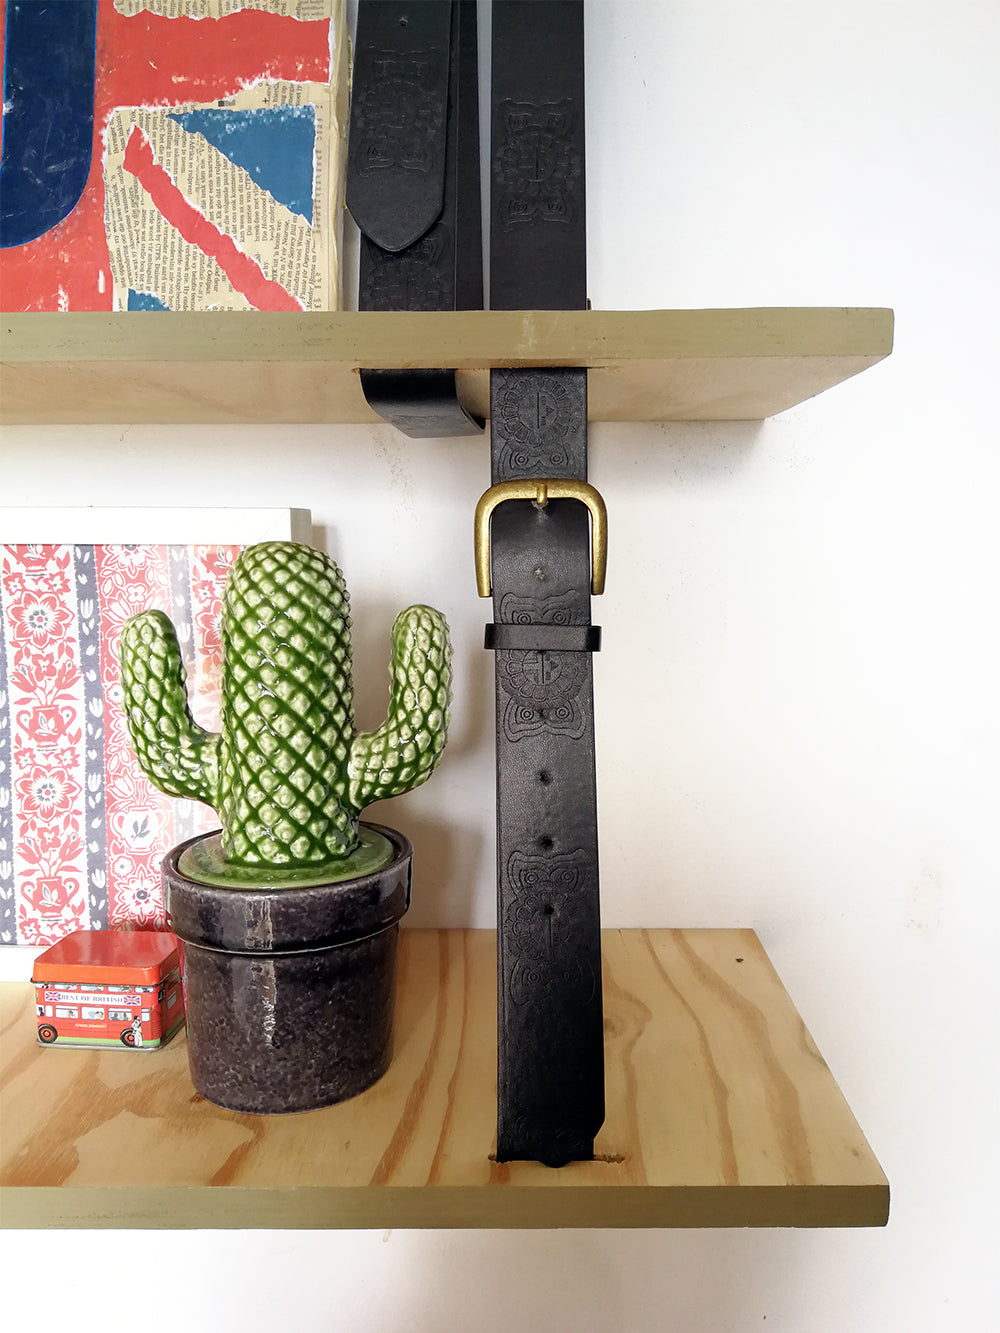
Install the curtain brackets on the wall and hang the rod and end caps. Thread the belts through the slots and hang over the rod.
We hope that you love this easy DIY as much as we do! Have a look at our other blog posts for some more inspiration: you won't believe what we've done with four finials, and a curtain rod! Please let us know in the comments below if you're going to try this project at home. And, please remember to bookmark this page so that you can come back easily for some more inspiring ideas and projects. We look forward to sharing another project with you soon!